_____________________________________________
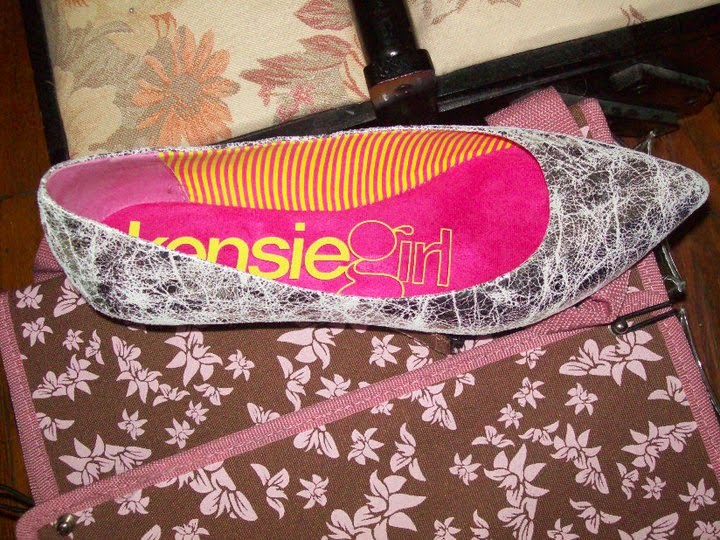
Show Make-over
Tools:
- Hot glue gun
- 2 Matching Jewels of Choice
- Shoes
- Edging/lace (at least 1 1/2 yards, if desired)


_____________________________________________Bouquet Shadow Box
Below, Top view (without lid)

Below: Top view

Below: Side view


____________________________________________
Show Make-over
Tools:
- Hot glue gun
- 2 Matching Jewels of Choice
- Shoes
- Edging/lace (at least 1 1/2 yards, if desired)
_____________________________________________Bouquet Shadow Box
Below, Top view (without lid)
Below: Top view
Below: Side view
____________________________________________

_____________________________________________
Creative Doctor Play, Part 1
I made a doctor's play kit for the boys. It included plenty of items for their little imaginations to run wild. One thing I saw when looking into what I wanted to put into their kits was a "cast" that was made by sewing 2 pieces of fabric together with 1 layer of cotton filling in the middle. For the children to attach & un-attach the "cast" to themselves easily, I placed a strip of Velcro in the middle that wraps around and allows the "cast" to be adjustable (placed on Mom's arm or a toddler's arm). For a genuine cast-like look, I took 2 colors of permanent marker and signed (with different handwriting for each) names and messages on the "cast." Below is a picture of the result.

____________________________________________
(Thank You Pinterest!)

_____________________________________________

 Tools/Materials:
- Pliers
- Beads of choice
- Thread & Scissors (if using beads)
- Wire of choice; there are many options in the craft sections at most stores...Walmart has several color options, as well. (Note: needs to be easily-able to bend & be worked with, yet strong enough to stay once you move the wire into the desired position)
- Chain of desired length (if choosing to do necklace)
- Fasteners (necklace)
- Any desired additional embellishments
NOTES:
For the ring...
...the awareness ribbon will be a separate piece from the band.
...before finishing the awareness ribbon, place the bead on the wire. Once the bead is on the wire, curl the end of the awareness ribbon to finish it off.

...the band of the ring does not attach in the back. They remain separate so that the ring is adjustable. The ends are simply curled up in opposite directions. It also gives it a more "finished look".
You can see an example of the back of the ring in the picture above.

For the necklace...
...After making the awareness ribbon, I used a tiny piece of wire (very, very tiny) to attach the 2 pieces of wire where they intersect.
...I attached the awareness ribbon to the necklace using a simple, round fastener.
...If you want to put jewelry on the necklace, I suggest using a clear "thread" and threading it through the bead (as normal), then knotting it on one side (it won't be seen due to the fastener). Leave some thread available and tie the jewel once more to the round fastener. This is your final knot, so make it inconspicuous, yet strong. Cut any extra thread. You can then attach your jewel anywhere on the necklace using the round fastener (make sure the closing stays tight or the bead will slip off).
For me, this is a wonderful reminder (and awareness for others when they see it and ask what it stands for) that I am a fighter & survivor of peripheral neuropathy, fibromyalgia, and chronic migraines.
_____________________________________________
Wheelchair Under-carriage Storage Net (D.I.Y.)

 I was loving my new ability to get around with less mobility issues due to my health conditions & with the freedom of my wheelchair. My newest favorite thing to do was to shop, which I hadn't done much of in 18 years! So you can imagine how much I've loved to get out on my own (when I can) and get groceries or items for the boys or the ministry, for instance, using my wheelchair.
The problem can sometimes be where to put your items while shopping. A shopping basket in your lap is always an option, but it is bulky (if you can avoid using it) and many places have stopped carrying them because people steal them easily by taking them out the door and placing them easily into their cars. So....solution? Instead of paying the $40 or so retail price for this item, I figured out a way to make this under-carriage storage net out of the following items:
- Heavy-Duty, Netted Laundry Bag from Walmart ($5)
- Black Velcro, 3/8" from Walmart ($0.99)
- Black Nylon or Vinyl Strap ($0.99/yard)
- Black Sewing Thread - name brand from Walmart (about $2.77)
-Scissors
-Sewing Machine
 You obviously need sewing skills to make this project happen, but it isn't difficult. You will need the wheelchair you are making this for close by (or the measurements to be EXACT for the under-carriage).
You will see how mine attaches in the pics above & below (3 Velcro attachments on each side, 1 large Velcro piece to attach on the back axle).
Also note that I made several "darts" in the netting and back as well to make the fit of the net more snug. Keep in mind that you can always cut more or sew it tighter, but you can't put fabric back on as easily.
I finished the edges with the black nylon or vinyl strap, as well as a zig-zag stitch.
The finished product has given me (so far) about 5 months of full-time use. I use it every time I go shopping (I get looks of amazement as to what I can fit under there), and put items that are not very heavy (such as milk), yet they take up lots of space.
This thing is a lifesaver and only cost me $10 roughly.
If you can sew and need an item like this, this is a project that is well worth your time!


 I was loving my new ability to get around with less mobility issues due to my health conditions & with the freedom of my wheelchair. My newest favorite thing to do was to shop, which I hadn't done much of in 18 years! So you can imagine how much I've loved to get out on my own (when I can) and get groceries or items for the boys or the ministry, for instance, using my wheelchair.
The problem can sometimes be where to put your items while shopping. A shopping basket in your lap is always an option, but it is bulky (if you can avoid using it) and many places have stopped carrying them because people steal them easily by taking them out the door and placing them easily into their cars. So....solution? Instead of paying the $40 or so retail price for this item, I figured out a way to make this under-carriage storage net out of the following items:
- Heavy-Duty, Netted Laundry Bag from Walmart ($5)
- Black Velcro, 3/8" from Walmart ($0.99)
- Black Nylon or Vinyl Strap ($0.99/yard)
- Black Sewing Thread - name brand from Walmart (about $2.77)
-Scissors
-Sewing Machine
You will see how mine attaches in the pics above & below (3 Velcro attachments on each side, 1 large Velcro piece to attach on the back axle).
Also note that I made several "darts" in the netting and back as well to make the fit of the net more snug. Keep in mind that you can always cut more or sew it tighter, but you can't put fabric back on as easily.
I finished the edges with the black nylon or vinyl strap, as well as a zig-zag stitch.
The finished product has given me (so far) about 5 months of full-time use. I use it every time I go shopping (I get looks of amazement as to what I can fit under there), and put items that are not very heavy (such as milk), yet they take up lots of space.
This thing is a lifesaver and only cost me $10 roughly.
If you can sew and need an item like this, this is a project that is well worth your time!
_____________________________________________
"Holidays for Heroes" Cards
Christmas Cards for Active or Wounded Military
P.O. Box 5456
Capitol Heights, MD 20791-5456
For guidelines and deadlines, see the official website:


_________________________________________________________________________________
Advent Calendar (Spiritually-Based):
Credit of idea goes to www.howsweeteritis.blogspot.com

 _______________________________________________________________________________Block Nativity Set: Print off nativity characters and color if needed. Cut out characters. Modge Podge (clear-coat glue & paint) the character on each block (under and over each cut-out). Let dry.
We did these with the MOPS (Moms of Preschoolers) group at First Baptist of Oxford and I absolutely LOVED how they turned out. My boys loved them even more!


_____________________________________________________________________________
Felt/Burlap Nativity Set:


______________________________________________________________________________


 Wheelchair tie-on seat covers (top left and bottom right) and hanging organizer (top right): both projects require only simple to basic sewing skills. You can customize the amount of pockets you would personally like for your organizer. I used elastic to allow some security of my items, as well as some sew-on Velcro where needed and/or desired. Good luck and have fun! Crafts are such good therapy!!!
_______________________________________________________________________________
Salt Dough Ornaments for Christmas 2013
(and as a keepsake before my dog's passing)
On all of these, I painted the entire salt dough ornament (after it completely dried) with a gold spray paint. After that dried, I used an acrylic paint and painting the indentations by hand with a paint brush. After that dried, I then spray painted the entire ornament 1 last time with a glossy spray paint. I labeled the back of the ornament with a sharpie marker by date and the boys' age, and the dogs' age (for the dog ornaments).


Below: Heart Ornament made from footprints of each of my boys (overlapped).


________________________________________________________________________________
Sheet-Music "Scroll Christmas Tree"
A successful Pinterest Project!!!
I used a half-piece of standard posterboard (white, so it would blend in with the music paper) and rolled it so that it made a cone, then hot-glued it in place. I cut off the extra poster board on the bottom to make an even surface.
For the sheet music, you can use either old sheet music (which can be either very expensive, hard to come by, or valuable), find a hymnal at a thrift store for cheap, or print off a few Christmas hymns. I suggest printing 2-sided if you print, because the backside of the paper will show when you roll it.
You will now want to take your sheet music and cut it into triangles. I preferred skinnier triangles. They were easier to manage and hot glue once they were rolled.
Once all of your music pieces are cut, you will start from the bottom of the cone and take the small end of one of the cut triangles (across from the longest end) and hot glue it to the posterboard. You only need a dot of hot glue. Using your fingers, roll the longest end of the triangle to make the size scroll that you desire and hot-glue it in place. You will repeat this process until you have finished the tree.
Tip: the closer the scrolls are to one another, the better the tree will look. You can also go back later and add in some pieces as well.
After you finish the tree, and if you desire, you can add embellishments, such as glitter glue (to make it look like snow), ribbon, etc.


_______________________________________________________________________________
D.I.Y. Dry-Erase "Board"
Made from a Frame & Designed from Scrapbook Paper & Ribbon (as Background)

Clothespin Wreath
Use foam board & stencil a large circle, then a smaller circle (to form a wreath form).
*Note: Foam board can be found at the Dollar Tree.
Cut the form out with box-cutters (for best accuracy and cleanest cut).
Use scrapbook paper (you will need pieces 2 of the same design for a large wreath) to line the foam board wreath. You can go about this in one of two ways:
1. Trace the foam board form on the back of the scrapbook paper and cut the scrapbook paper. Then hot-glue (or paste) the scrapbook paper to the foam board.
2. Place the [uncut] scrapbook paper over the foam board and ensure that the scrapbook paper will cover all ends of the wreath. Then begin hot-gluing (or pasting). If you use hot-glue, just do little sections at a time. Once the scrapbook paper is glued completely to the wreath, you can use the box-cutters to cut out the scrapbook paper as closely to the foam board as possible.
Lay out clothespins in desired spacing on the foam board. Once the clothespins are in the desired place, hot glue them (one by one).
Lastly, use one of the clothespins as a reference for size, and cut the desired scrapbook paper pattern out to fit the clothespin size. You will need the number of how ever many clothespins you end up using for your wreath. These cut-outs will fit over the top section only of the clothespin, and it will not interfere with the function of the clothespin.
You can add embellishments, a ribbon for hanging the wreath, etc. once you're done with all of the other steps.

D.I.Y. Glass-Beaded Vase & Votive
I used glass beads from the Dollar Tree and Walmart and hot glued them on these $1 vases/votives. I started at the bottom, and added layers until I liked the result. I finished it off with a ribbon/bow toward the top (leave room for it if you want the ribbon). I loved the result - so simple, cute, and CHEAP!!!

Rustic Baggage-Claim Ticket Banner
I needed a cute and creative way to make a sign for our chronic illness ministry display table. I finally came across this cute idea to use rustic baggage claim tags. I went to Google Search and searched for free downloadable/printable baggage-claim images. There were plenty to choose from, and I finally found the right one for our display.
I downloaded the image (legally ;p) and placed the text in each claim ticket. I played with the font until I got it just like I wanted it. I then printed it out and laminated each claim ticket with postage tape (an easy and efficient way to laminate - if you haven't done it before, practice on something less important first). I then cut around the edges, hole punched each claim ticket, and strung each letter & word together with hemp rope (found in the craft section). I played around with the knots I could use for this project. I did each word individually. I personally liked the look of it this way, but it also depends on how you display the banner. I reinforced the back of the sign (so it wouldn't move around or get tangled) with felt and hot glue. I personally liked the fact that I didn't have to work at getting each letter perfect when I displayed it each time.

_______________________________________________________________________________
Encouragement Basket for an Ill or Injured Friend
Candy you will need:
Kit Kat Bar
Crunch Bar
100 Grand
Sour Patch Kids
Microwave Popcorn
Hot Cocoa
____________________
(Below: Crunch Bar)
(Below: Crunch Bar)
When you feel like
life will CRUNCH around
you, read Psalm 55:22:
Cast your cares on the Lord
and he will sustain you;
he will never let the
righteous be shaken.
____________
(2 Separate circles & cut-outs -
one will go in front of the other on the package or bag)
I know you're going
through a SOUR PATCH.
Remember to always lean on
God's everlasting promise
of hope and rest:
PSALM 62:5-8:
Yes, my soul, find rest in God;
my hope comes from him.
Truly he is my rock and my salvation;
he is my fortress, I will not be shaken.
My salvation and my honor depend on God;
he is my mighty rock, my refuge.
Trust in him at all times, you people;
pour out your hearts to him,
for God is our refuge.
my hope comes from him.
Truly he is my rock and my salvation;
he is my fortress, I will not be shaken.
My salvation and my honor depend on God;
he is my mighty rock, my refuge.
Trust in him at all times, you people;
pour out your hearts to him,
for God is our refuge.
_____________________
(Below: Kit-Kat Bar)
(Below: Kit-Kat Bar)
Bad news
makes you feel like saying
GI'ME A BREAK! But with plenty
of prayers and sweets, you'll be
thinking positive and
singing praises.
___________________________________
(Below: 100 Grand Bar
*Changed from original)
(Below: 100 Grand Bar
*Changed from original)
When you feel like your
medical
bills are going to be 100 GRAND,
smile & remember that God provides for
our every need. Read Philippians 4:19:
bills are going to be 100 GRAND,
smile & remember that God provides for
our every need. Read Philippians 4:19:
And my God will supply all your needs
according to His riches in glory in Christ Jesus.
___________________
according to His riches in glory in Christ Jesus.
___________________
(Below: Hot Cocoa)
Proverbs 3:24:
When you lie down,
When you lie down,
you will not be afraid;
when you lie down,
your sleep will be
SWEET.
__________________
(Below: Popcorn)
(Below: Popcorn)
FIZZ, FIZZ!
POP, POP!
POP, POP!
God's care for us
will never stop!


________________________________________________________________________________
Reminders of God's Promises through Small Gifts
Incense - Psalm 141:1-2 - I call to you; Lord, come quickly to me;
hear me when I call to you.
May my prayer be set before you like INCENSE;
may the lifting up of my hands be like the evening sacrifice.
Candle (or flashlight) - Matthew 5:14-16 - You are the LIGHT of the world. A town built on a hill cannot be hidden. Neither do people LIGHT a lamp and put it under a bowl. Instead, they put it on its stand, and it gives LIGHT to everyone in the house. In the same way, let your LIGHT shine before others, that they may see your good deeds and glorify your Father in heaven.

Eraser - Caption: "No matter how big our mistakes, we can always rejoice in the fact that God can erase our shortcomings and sin. He is a God of forgiveness!"
Psalm 103:12 - As far as the east is from the west,
so far has he REMOVED our transgressions from us.
Body Wash/Shampoo/Hand Sanitizer -
1 John 1:9 - If we confess our sins, he is faithful and just and will forgive us our sins and CLEANSE us from all unrighteousness.

~~~~~~~~~~~~~~~~~~~~~~~~~~~~~~~~~~~~~~~~~~~~~~~~~~~~~~~~~~~~~~~~~~~~~~~
D.I.Y. Dog PVC Wheelchair


My dog, Chance, suddenly loss the full use of his legs (more
than likely due to a pinched nerve) and needed a way to gain more mobility. The
typical professionally-made dog wheelchair costs at least $200. This DIY
wheelchair works beautifully and cost us $15. We bought all supplies at our
local home department store & the strap & velcro in the fabric section
at Walmart.
Our dog weighs 15 lbs., so we used about 6 feet of 1/2" PVC. If your dog is bigger, use a larger width PVC and you will need more length of PVC.
Materials:
You need a yardstick, drill, screw driver/ratchet, 2 elbows (PVC), 6 caps (PVC), 2 cross sections (X's / PVC), 2 axle-based wheels, 2 medium length screws, 2 bolts, 2 washers, PVC glue, hand saw, 2 yards strap ribbon (1" in diameter - larger for a larger dog), Velcro (sew-in or stick on), hot glue gun & hot glue strips. For cosmetic touches (if desired): spray paint to paint PVC (before hot gluing the Velcro on the PVC), cute ribbon to line the strap ribbon (sew it on or hot-glue it on).
*Random tip - to save
money, we used a pair of wheels off a walker. Skate board wheels and many
wheels from toys work just as well. Just make sure they are axle-based wheels
and sturdy enough for your dog's weight.

Instructions:
*Use diagram for
reference. Have your dog handy - you will need measurements throughout the
process. Also remember that you can always cut more PVC if you get the
measurement too long, but you can't add more if you cut too much.
1. Measure from the shoulder to the hip of the dog. Cut two
pieces of PVC with this length. These are both part "A". Put to the
side.
2. Part B should be free from the backside by about 4
inches. There is always room for ingenuity, so change the structure if you want
more or less length for part B. Cut two pieces of PVC with this length. These
are both part "B."
3. To measure for part C, measure the dog's height (from
pads of feet to topside of hips). If your dog still has some mobility in
his/her back legs and you would like him/her to be able to have feet touching
ground/able to move, cut the exact measurements of dog's height. If your dog
has no mobility and you would like the feet off the ground, add 1 or 2 inches
to the height you measured. Cut two pieces of PVC with this length. These are
both part "C."
4. Part D is simply for cosmetics, as it allows for a cap to
be put on instead of having a gaping hole in the PVC. You want about 3-4 inches
of PVC for each cut. Cut two pieces of PVC with this length. These are both
part "D."
5. For the last cut of PVC, measure the dog's width from
shoulder to shoulder (you may want to also measure width of hips and take the
larger number as your final measurement). Add 1 inch to this length. Cut one
piece of PVC with this length. This is part "E."
6. Using the PVC caps, X's, and elbows, piece together the
chair to check for measurement problems (don't glue the unit together just yet;
use the diagram/picture for reference). The wheels should add about 1/2" -
1" to the height. If changes need to be made, go ahead and make them. Once
you are certain you like the fit, you can glue the unit together with PVC
glue/cement (this stuff is strong - you might want to take this task outside).
7. If you want to spray-paint the wheelchair, now is the
time to do it.
8. Next you need a drill, screw driver/ratchet and both
screws, bolts, washers, and wheels. Drill a small hole (slightly smaller than
the screw) on parts "C" about 1-2 inches from the bottom of the PVC
(this is where the wheels will sit). Install the wheels.
9. For the next steps, you will need a hot-glue gun and
hot-glue sticks and Velcro. You want to hot-glue a Velcro strip (same sides)
around the PVC (see actual picture - not diagram - for a better visual) on the
immediate sides of the X's (PVC). There will be 4 total pieces of Velcro here.
10. Hot-glue a Velcro strip (same sides as step 9) around
the PVC at the end of part "A" (near the caps; where the wheelchair
meets the dog's chest).
11. If you want to add a decorative/colorful ribbon to the
strap ribbon, now is the time to do it. You can either sew it on or hot-glue it
on.
12. Using the strap ribbon, measure around the dog's middle
(right below the armpit). Add 4 inches to the measurement. Cut the strap
ribbon. Burn the edges with a lighter to keep from fraying. Use the actual
image - not the diagram - for a better visual of where this strap will go.
13. Make a mark with a pen on the underside of the strap
ribbon of where the Velcro (opposite side of that in steps 9 and 10) should be
attached according to the Velcro on the PVC (for the topside of part
"A"). Hot-glue a strip of Velcro over the mark on both sides. Make it
wide enough to attach firmly.
14. Hot-glue a 4-5 inch piece of Velcro (opposite sides so
they attach to each other) in order to attach and un-attach the shoulder strap
with ease. The shoulder strap is now complete.


15. With the strap ribbon, make an "X" formation
that is large enough to fit each of your dog's legs. Hot-glue the middle of the
"X" (or sew it in place).
16. Cut four 3-inch pieces of Velcro (opposite sides of that in steps 9 and 10). Hot-glue one piece of Velcro to each end of the "X" (leave as much Velcro as possible visible). This will now attach to the back section of the wheelchair. Your dog's legs will go into each slot and criss-cross in between.
16. Cut four 3-inch pieces of Velcro (opposite sides of that in steps 9 and 10). Hot-glue one piece of Velcro to each end of the "X" (leave as much Velcro as possible visible). This will now attach to the back section of the wheelchair. Your dog's legs will go into each slot and criss-cross in between.

You have now completed the project! I hope it worked out
just as well for you as it did for us!

____________________________________________________________________
Custom Wheelchair Upholstery
I used a cheap quilter's fabric ($2 a yard at Walmart - on clearance) for the upholstery. I removed the back of the chair (via velcro) and sized my fabric accordingly, then sewed the fabric directly onto the back of the original fabric chair piece. I cut around the "Vision" icon and stitched around it, but you can also simply cover the icon(s).
Wheelchair Cushion
If you are like me and do not sit in your chair all day, you can make your own cushion for $6 instead of paying the $300 or more for a Jay Specialty Cushion. However, some people have specific needs for these specialty cushions, and it is very important to stick to those rather than a DIY cushion (prevent sores, bruises, etc.).
I went to the craft section of Walmart and got the package of 4 thin 17 x 17 " foam cushions for around $6. I used all 4 cushions for my chair. You will also need to buy the sew-on velcro (a "bundle" is usually on $0.88 at Walmart). You will need regular sewing scissors to cut the cushions and hot glue to glue them together.
I left two of the 17 x 17 " cushions exactly as they came. I cut the other two into 4 equal strips each (8 strips total) and positioned 4 of the strips on one of the original 17 x 17" cushions (bottom layer) as to make a square opening in the of the middle of the cushion (you will still see the bottom layer). I glued that into place. I then took 2 more strips, stacked and glued them longways across the FRONT side of the cushion (where my legs would rest) so as to lift my legs slightly from the rest of the seat. I glued those 2 into place. Lastly, I placed the last original 17 x 17 " cushion over the top of the cushion, so as to cover the square hole created by the 4 foam strip (now glued into place).
I experimented with the contouring of the cushion specifically for my needs, and have loved the comfort of it. You can always experiment with the placement of the strips before you glue them into place.
I completed the cushion by creating a matching cover (I placed a waterproof pillow protector over the foam cushion before sewin on the matching cover). I glued 2 velcro strips on the bottom side of the cushion to attach to the chair.


_______________________________________________________________________________
Quilted Wheelchair Purse/Bag
(Matches the Upholstery)
I used the same fabric as I did for the upholstery of the chair for the outside of the bag. I used a red fabric for the inside color, and quilter's batting to go in between the black/white and red fabric (gives a slight cushion/filler). I used sew-on velcro in 2 places along the top of the bag for privacy/closure of the bag. I added a thin red ribbon to the upper edge of the bag and along the strap to add some color.


______________________________________________________________________________
Wheelchair Bag (Removable)
I used an old diaper bag (still in good shape - on of the freebies from Enfamil) and hot-glued my choice of ribbon on the top edges of the bag and over the Enfamil tag. There was no sewing involved. One tip - use a lighter to slightly burn the cut edges of the ribbon to keep them from fraying.


 ________________________________________________________________________________
"I Love You Because..." Dry-Erase Frame
Use a regular frame (ideally, at least an 8 x 7 size frame) as a dry-erase board. For the background, use scrapbook paper and print off what you want to permanently be in the frame.
Example 1: "I love you because..."
Example 2: "2 Timothy 3:16 - All scripture is God-breathed and is useful for teaching, rebuking, correcting, and training in righteousness..."

~~~~~~~~~~~~~~~~~~~~~~~~~~~~~~~~~~~~~~~~~~~~~~~~~~~~~~~~~~~~~~~~~~~~~~~
Custom Recipe Book
Copy and print recipes from Pinterest easily in the same format, which makes it easier to organize and plan meals.

~~~~~~~~~~~~~~~~~~~~~~~~~~~~~~~~~~~~~~~~~~~~~~~~~~~~~~~~~~~~~~~~~~~~~~~~
Use an empty Lysol or Clorox wipes container as a portable/vehicle trash can. I made it cute by wrapping it in scrapbook paper and laminating it with postage tape.

~~~~~~~~~~~~~~~~~~~~~~~~~~~~~~~~~~~~~~~~~~~~~~~~~~~~~~~~~~~~~~~~~~~~~~~

~~~~~~~~~~~~~~~~~~~~~~~~~~~~~~~~~~~~~~~~~~~~~~~~~~~~~~~~~~~~~~~~~~~~~~~~
"Train Up a Child" Bible
For instructions, material costs, and scripture, click HERE.

~~~~~~~~~~~~~~~~~~~~~~~~~~~~~~~~~~~~~~~~~~~~~~~~~~~~~~~~~~~~~~~~~~~~~~~~
I found this scripture art on Pinterest during a time when I was going through a lot. I needed this reminder literally hanging in front of me, so I simply hit "copy/paste", printed it from Microsoft Word, and mounted it on some scrapbook paper. For the first one (Isaiah 41:10), I laminated it with postage tape (you can't see the lines if you get the "easy-start" tape). For the second (Isaiah 66:9), I simply printed it and pasted it to a dollar pan.


~~~~~~~~~~~~~~~~~~~~~~~~~~~~~~~~~~~~~~~~~~~~~~~~~~~~~~~~~~~~~~~~~~~~~~~~
I really wanted to show off our wedding keepsakes, so I went to Hobby Lobby and purchased a shadow box during a 50% off sale, and hot-glued the items to the box. If the items are especially sentimental to you, you probably want to try pinning the items to the board so they can be removed without damage, if desired.

~~~~~~~~~~~~~~~~~~~~~~~~~~~~~~~~~~~~~~~~~~~~~~~~~~~~~~~~~~~~~~~~~~~~~~~~
D.I.Y. Hanging Jewelry Organizer
D.I.Y. jewelry organizer, made using a decorative hanger, ribbon, medium-net tulle, and fabric of choice. Required basic sewing skills.


~~~~~~~~~~~~~~~~~~~~~~~~~~~~~~~~~~~~~~~~~~~~~~~~~~~~~~~~~~~~~~~~~~~~~~~
Award MedalDisplay Shadow Box
Medal display (from my many years in middle and high school honor bands):


~~~~~~~~~~~~~~~~~~~~~~~~~~~~~~~~~~~~~~~~~~~~~~~~~~~~~~~~~~~~~~~~~~~~~~~~
Chic Apron
Apron - Requires simple/beginner sewing skills (I confess, this was a pre-packaged/pre-patterned apron from the Walmart sewing section, but still SUPER cute! ;D).

~~~~~~~~~~~~~~~~~~~~~~~~~~~~~~~~~~~~~~~~~~~~~~~~~~~~~~~~~~~~~~~~~~~~~~~~


No comments:
Post a Comment